
Gluten-Free Chickpea Flatbread Pizza Crust Recipe

This recipe has become a busy evening favorite at my house. As with any pizza, you can make it as complicated or simple as you like. I erred on the simple side for this ‘za (as my brother the pizza delivery driver says…) to help you get a handle on this method of creating the crust. Also, with a pizza this basic, you likely have most of the ingredients in your fridge.
Recipe Inspiration Food Matters, Mark Bittman
This dish has evolved from the Mark Bitman recipe for Easy Whole Grain Flatbread. He mentions building the pizza after the bread (crust) is fully cooked, but I have modified the cooking times to accommodate a hearty dose of toppings.
I have baked this off quite a few times and have included a few tips below that will aide you in a perfect pizza on your first try.

Chickpea Pizza Crust Recipe with Eggs, Tomatoes and Spinach
Ingredients
Crust
- 1 ½ cups – dry chickpeas (garbanzo beans) ground into flour
- 1/2 teaspoon of salt
- 2 1/2 cups water
- 2-3 tablespoons olive oil
Toppings
- 1 cup – pizza sauce
- 12 ounces – fresh mozzarella
- 2 handfuls – spinach
- 3 – roma tomatoes, sliced thinly
- 4 to 6 – eggs
- salt and pepper to taste
1. Grind chickpeas into flour with blender. This is really loud, but works well. Grind on medium to high speed for about 1-2 minutes depending on the blender. The end result should be coarse flour texture. I have experimented in grinding it till super fine, but found I prefer a little more texture.
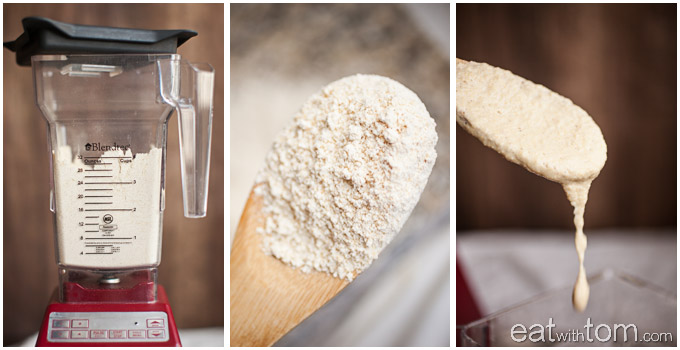
2. Add salt and restart blender on the low setting. Slowly add water to combine. Alternatively you can place the chickpea flour into a large mixing bowl and slowly whisk in water. The mixture should resemble a thin pancake batter.
3. Transfer to a mixing bowl and let the batter rest for an hour (up to 12 hours). This allows the liquid to penetrate and creates a smooth, creamy texture for your crust. No time to wait? Just soak it while the oven preheats, it will still be great!
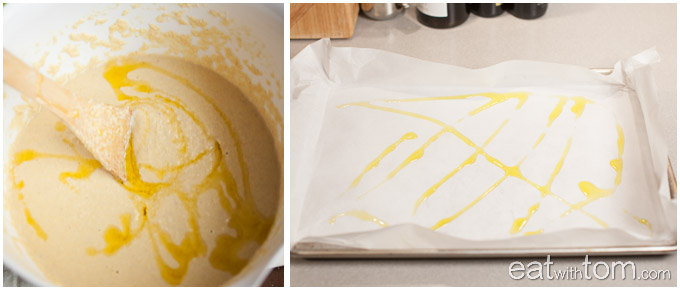
4. Preheat the oven to 450F. Add a drizzle of olive oil to the chickpea batter and stir. Line a half sheet pan (13×18) with parchment paper and lightly coat the paper with olive oil. Prepare pizza topping ingredients.
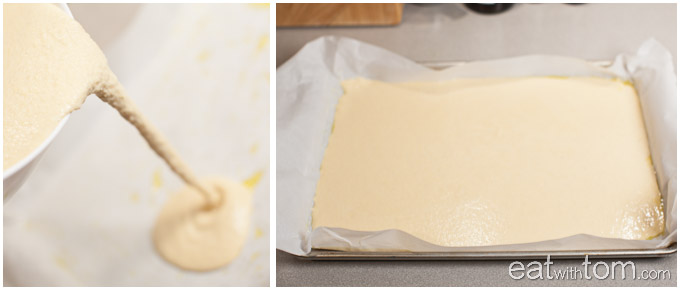
5. Pour the batter into the pan, swirl to spread evenly and to the edges. PLEASE, FOR THE LOVE OF PIZZA, DO NOT STIR IT IN THE PAN WITH YOUR SPATULA! IT WILL STICK AND YOUR FRIENDS WILL LAUGH AT YOU. It should look like a big pancake!
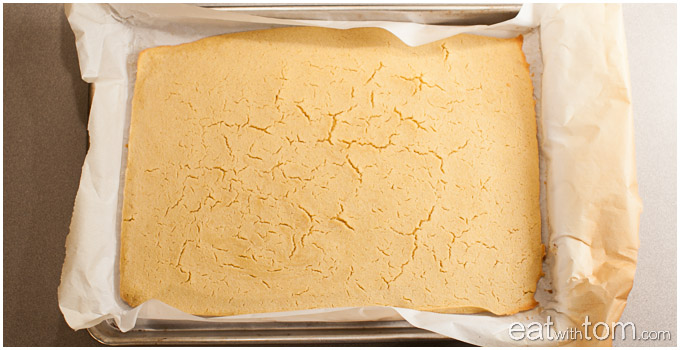
7. Put pizza crust into the oven and cook for 20 minutes or until the bread begins to brown slightly on the edges. Some small cracks may emerge on the surface too, no worries.
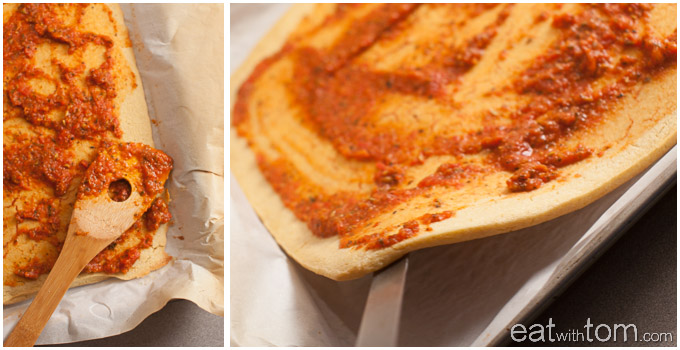
8. Remove the pan from the oven. Gently loosen the crust from the parchment paper to ensure a smooth lift off when loaded with your toppings.
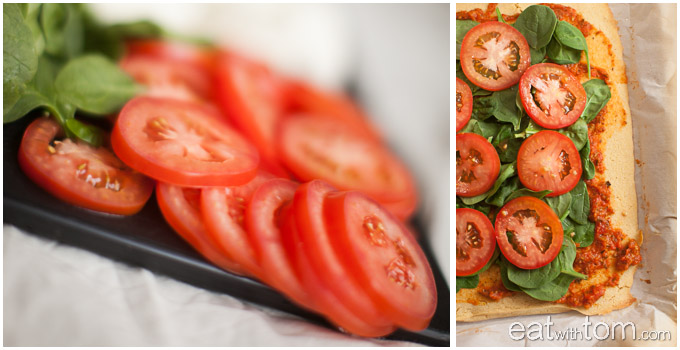
9. Build your pizza by spreading the pizza sauce first,then cover with spinach, tomatoes, and mozzarella. Salt and pepper as desired. Return to oven for 10 minutes.
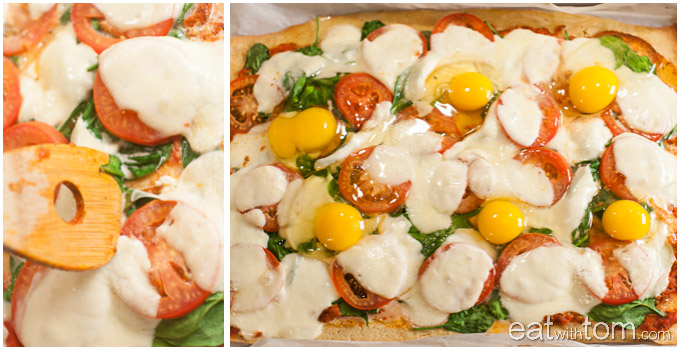
10. Remove pizza from oven. Create landing zones for each egg by denting the cheese topping with the back of a large spoon. Without the dent, your egg is likely to shoot right off the pizza! Crack all eggs onto the pizza and return to the oven. Cook for an additional 5-10 minutes depending on your egg preference. Keep an eye on the pizza, the eggs can go quick and will continue to cook during the resting period.
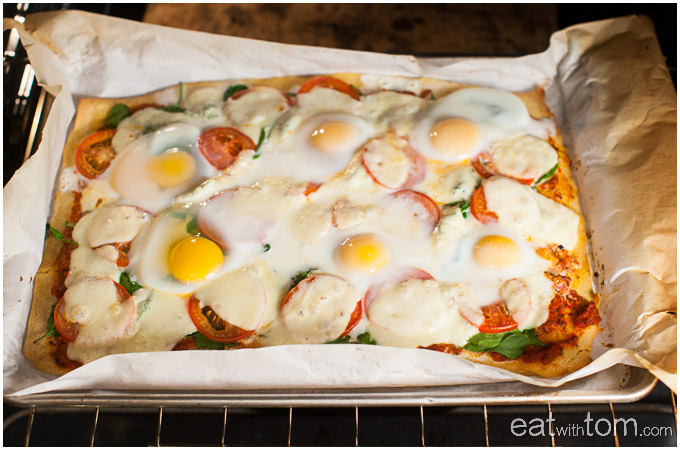
11. Remove from oven and transfer pizza to a cooling rack. Allow to rest for 3-5 minutes. Transfer to a cutting board and cut as desired.
Let’s Eat!
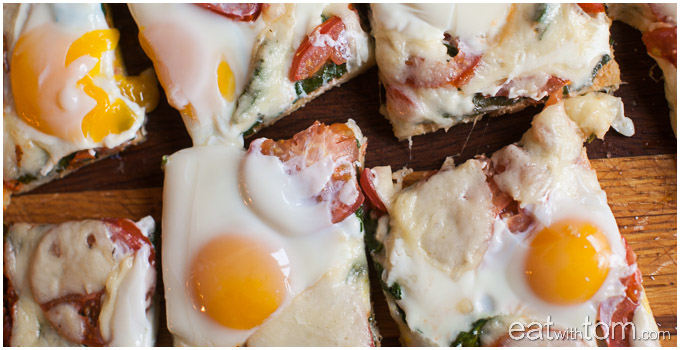
Chickpea Pizza with Eggs, Spinach and Tomatoes

This gluten-free pizza recipe will leave you not only satisfied, but inspired to create all kinds of pies. The chickpea crust has a uniquely creamy and hearty taste that will fill you with happiness, guilt free. Not to mention, the crust is soooo easy to make, you will never have the urge to deal with a ‘regular’ pizza dough again!
Crust
- 1 ½ cups – dry chickpeas (garbanzo beans ground into flour)
- 1/2 teaspoon of salt
- 2 1/2 cups water
- 2-3 tablespoons olive oil
Toppings
- 1 cup – pizza sauce
- 12 ounces – fresh mozzarella
- 2 handfuls – spinach
- 3 – roma tomatoes (sliced thinly)
- 4 to 6 – eggs
- salt and pepper to taste
- Grind chickpeas into flour with blender. This is really loud, but works well. Grind on medium to high speed for about 1-2 minutes depending on the blender. The end result should be coarse flour texture. I have experimented in grinding it till super fine, but found I prefer a little more texture.
- Restart blender on the low setting and slowly add water to combine. Alternatively you can place the chickpea flour into a large mixing bowl and slowly whisk in water. The mixture should resemble a thin pancake batter.
- Let the batter rest for an hour (up to 12 hours). This allows the liquid to penetrate and creates a smooth, creamy texture for your crust. No time to wait? Just soak it while the oven preheats, it will still be great!
- Preheat the oven to 450F. Line a quarter sheet pan (9×13) with parchment paper and lightly coat the paper with olive oil. Prepare pizza topping ingredients.
- Pour the batter into the pan, swirl to spread evenly and to the edges. PLEASE, FOR THE LOVE OF PIZZA, DO NOT STIR IT IN THE PAN WITH YOUR SPATULA! IT WILL STICK AND YOUR FRIENDS WILL LAUGH AT YOU. It should look like a big pancake!
- Put pizza crust into the oven and cook for 20 minutes or until the bread begins to brown slightly on the edges. Some small cracks may emerge on the surface too, no worries.
- Remove the pan from the oven. Gently loosen the crust from the parchment paper to ensure a smooth lift off when loaded with your toppings.
- Build your pizza by spreading the pizza sauce first,then cover with spinach, tomatoes, and mozzarella. Return to oven for 10 minutes.
- Remove pizza from oven. Create landing zones for each egg by denting the cheese topping with the back of a large spoon. Without the dent, your egg is likely to shoot right off the pizza! Crack all eggs onto the pizza and return to the oven. Cook for an additional 5-10 minutes depending on your egg preference. Keep an eye on the pizza, the eggs can go quick and will continue to cook during the resting period.
- Remove from oven and transfer pizza to a cooling rack. Allow to rest for 3-5 minutes. Transfer to a cutting board and cut as desired.
- Let’s Eat!

Leave a comment